Documentation
Build Your First Supply Chain
Overview
In this example, we’ll explore the two fundamental resources that an operator deploys, templates and supply-chains, and how these interact with the resource a dev deploys, the workload. We’ll also see how we grant Cartographer RBAC permission to create our specified objects with a service account. We’ll do this with an incredibly simple supply chain, one that has a single step: creating a deployment from an image.
Environment setup
For this tutorial you will need a kubernetes cluster with Cartographer installed. You may follow the installation instructions here.
Alternatively, you may choose to use the ./hack/setup.sh script to install a kind cluster with Cartographer. This script is meant for our end-to-end testing and while we rely on it working in that role, no user guarantees are made about the script.
Command to run from the Cartographer directory:
./hack/setup.sh cluster cartographer-latest
If you later wish to tear down this generated cluster, run
./hack/setup.sh teardown
Scenario
We will work as the devs and the app operators in a company creating hello world web applications. As app devs we will already have created pre-built images of these distros. Our supply chain will create deployments with these pre-built images on them. We will work first as the app operators to create the appropriate template, supply chain, and service account. Then we will work as the app devs to create our workload object.
Steps
App Operator Steps
Templates
For any template there are fields that the operator can hardcode for all apps and there are other fields that will need to vary. There are two concerns that can necessitate a field varying:
- Some fields must be unique across the fleet of apps from all devs.
- Some fields must have specific values specific to the particular application (generally known only by the application developer).
For our scenario, we will create a Kubernetes Deployment for each application. Let us wrap a deployment in a Cartographer ClusterTemplate, notating fields that will need to vary and fields that can be hardcoded:
apiVersion: carto.run/v1alpha1
kind: ClusterTemplate
metadata:
  name: app-deploy
spec:
  template:
    apiVersion: apps/v1
    kind: Deployment
    metadata:
      name: # MUST BE UNIQUE
      labels:
        app: # MUST BE UNIQUE
    spec:
      replicas: # CAN BE HARDCODED
      selector:
        matchLabels:
          app: # MUST BE UNIQUE
      template:
        metadata:
          labels:
            app: # MUST BE UNIQUE
        spec:
          containers:
            - name: # MUST BE UNIQUE
              image: # KNOWN ONLY TO THE DEV
We can see an example of a field that may be hardcoded. The number of replicas is a concern of the app operator and can be set for all apps as policy. We can see the template evolve:
...
spec:
  template:
    apiVersion: apps/v1
    kind: Deployment
    spec:
      replicas: 3
      ...
    ...
Next, we will fill the fields that must be unique. Every application will be specified in a workload object specified by
the developer. We know that these objects (as all kubernetes objects) have unique names in their namespaces. As such, we
can leverage that name for all fields that must be unique. That name can be found on the workload object at
.metadata.name. We can see that in use below:
...
spec:
  template:
    apiVersion: apps/v1
    kind: Deployment
    metadata:
      name: $(workload.metadata.name)$-deployment
      labels:
        app: $(workload.metadata.name)$
    spec:
      ...
      selector:
        matchLabels:
          app: $(workload.metadata.name)$
      template:
        metadata:
          labels:
            app: $(workload.metadata.name)$
        spec:
          containers:
            - name: $(workload.metadata.name)$
              ...
Finally, there are the fields that are known only to the dev. There are a few classes of information so fundamental to the process of building and deploying applications that the workload has fields for their specification. We can see these in the reference for the Workload custom resource. They include:
- Location of source code
- Environment variables to use in building images
- Location of pre-built images
- Resource constraints
- And more…
For our example, the workload field for specifying the location of pre-built images is exactly what is necessary. We will expect the appropriate image address to be specified on the workload in the “.spec.image” field.
...
spec:
  template:
    ...
    spec:
      template:
        spec:
          containers:
            - image: $(workload.spec.image)$
              ...
      ...
Let’s look at the completed template:
---
apiVersion: carto.run/v1alpha1
kind: ClusterTemplate
metadata:
  name: app-deploy
spec:
  template:
    apiVersion: apps/v1
    kind: Deployment
    metadata:
      name: $(workload.metadata.name)$-deployment
      labels:
        app: $(workload.metadata.name)$
    spec:
      replicas: 3
      selector:
        matchLabels:
          app: $(workload.metadata.name)$
      template:
        metadata:
          labels:
            app: $(workload.metadata.name)$
        spec:
          containers:
            - name: $(workload.metadata.name)$
              image: $(workload.spec.image)$
Wonderful! As app operators, we have created the template desired for our supply chain.
Service Account
Next, we turn to permissions. For Cartographer to create objects it needs RBAC permission to do so. For that we’ll create a service account that will specify the requisite permissions to create, update, and otherwise manage the objects referred to in our templates.
First let’s create a service account. For ease of use in this tutorial, we’ll create it in the default namespace.
---
apiVersion: v1
kind: ServiceAccount
metadata:
  name: cartographer-pre-built-sa
  namespace: default
Now we’ll create the roles we want this service account to have. In our case, we need a role allowing us to manage deployments.
---
apiVersion: rbac.authorization.k8s.io/v1
kind: Role
metadata:
  name: deploy-image-role
rules:
  - apiGroups:
      - apps
    resources:
      - deployments
    verbs:
      - list
      - create
      - update
      - delete
      - patch
      - watch
      - get
Now we bind the role to our service account:
---
apiVersion: rbac.authorization.k8s.io/v1
kind: RoleBinding
metadata:
  name: cartographer-prebuilt-role-binding
roleRef:
  apiGroup: rbac.authorization.k8s.io
  kind: Role
  name: deploy-image-role
subjects:
  - kind: ServiceAccount
    name: cartographer-pre-built-sa
Great, we’ve created all of the objects to which the supply chain will refer: templates and a service account. Let’s create the supply chain!
Supply Chain
The supply chain has three top level fields in its spec, the resources, a service account reference and a selector for workloads.
We’ll start with the resources field, which is a list. Each item in the resource list represents an object that will be stamped out in the supply chain of each workload. We give each a name and a reference to a template. In the example below we can see the templateRef has the name and kind of the template:
  resources:
    - name: deploy
      templateRef:
        kind: ClusterTemplate
        name: app-deploy
Next we’ll add the reference to the service account:
  serviceAccountRef:
    name: cartographer-pre-built-sa
    namespace: default
Our last step with the supply chain is to specify the selector. This is the set of labels on a workload that will
indicate that the workload matches with this supply-chain, rather than some other supply chain. We specify the types of
workloads that are appropriate for this supply chain. For our example, we only want workloads that have pre-built images
to match with this supply chain. Let’s enforce that by expecting workloads that match to have the label
workload-type: pre-built:
  selector:
    workload-type: pre-built
We can bring these all together for our complete supply chain:
---
apiVersion: carto.run/v1alpha1
kind: ClusterSupplyChain
metadata:
  name: supply-chain
spec:
  resources:
    - name: deploy
      templateRef:
        kind: ClusterTemplate
        name: app-deploy

  serviceAccountRef:
    name: cartographer-pre-built-sa
    namespace: default

  selector:
    workload-type: pre-built
We’re now ready to submit these objects to our cluster. The next responsibility is for our app developers to submit workloads. Let’s step into that role now.
App Dev Steps
Our app operators have created a contract that needs to be fulfilled by our workload. First, we’ll need to ensure that our workload has the necessary labels to match with the selector. We can see that on the workload below.
apiVersion: carto.run/v1alpha1
kind: Workload
metadata:
  name: hello
  labels:
    workload-type: pre-built # <=== label matches selector of our supply chain
spec: ...
Next, our workload must provide all of the values referenced in the templates of the supply chain. We’ll remember that
for this supply chain that is the location of a pre-built image. Let’s point to
our very sophisticated hello-world app:
docker.io/nginxdemos/hello:latest
spec:
  image: docker.io/nginxdemos/hello:latest
We bring it all together:
---
apiVersion: carto.run/v1alpha1
kind: Workload
metadata:
  name: hello
  labels:
    workload-type: pre-built
spec:
  image: docker.io/nginxdemos/hello:latest
And we’re done! The app dev always has less work to do than the app operator.
Let’s submit all of these items to the cluster!
Observe
Workload
The workload quickly resolves. We can examine the workload object:
kubectl get -o yaml workload hello
apiVersion: carto.run/v1alpha1
kind: Workload
metadata:
  generation: 1
  labels:
    workload-type: pre-built
  name: hello
  namespace: default
  ...
spec:
  image: docker.io/nginxdemos/hello:latest
  serviceAccountName: cartographer-pre-built-sa
status:
  conditions: ...
  observedGeneration: 1
  resources: ...
  supplyChainRef:
    kind: ClusterSupplyChain
    name: supply-chain
Let’s look more closely at the status.conditions:
status:
  conditions:
  - lastTransitionTime: ...
    message: ""
    reason: Ready
    status: "True"
    type: SupplyChainReady
  - lastTransitionTime: ...
    message: ""
    reason: ResourceSubmissionComplete
    status: "True"
    type: ResourcesSubmitted
  - lastTransitionTime: ...
    message: ""
    reason: Ready
    status: "True"
    type: Ready
  ...
The SupplyChainReady condition merely tells us that the SupplyChain is in a healthy condition. e.g. if we do a
kubectl get -o yaml clustersupplychain supply-chain, we’ll see that it’s top level Ready condition is true.
The ResourcesSubmitted condition is more important. It tells us that all of the objects that were specified in the
supply chain have been created. It is important to note, this does not indicate that every submitted resource has
finished reconciling.
The Ready condition is the top level condition. For this condition to be true, all other conditions must be as well. A
quick scan of this value can let you know if the workload is in a ready state.
You may want to more closely examine the resources deployed. Maybe a step in the supply chain is reporting a problem. Or
maybe you want to check if a successfully deployed object has completed reconciling. For such purposes we can use the
status.resources field.
status:
  resources:
  - name: deploy
    stampedRef:
      apiVersion: apps/v1
      kind: Deployment
      name: hello-deployment
      namespace: default
    templateRef:
      apiVersion: carto.run/v1alpha1
      kind: ClusterTemplate
      name: app-deploy
  ...
status.resources contains a reference to each of the objects created by the supply chain. For our single step supply
chain, we can see the name of that step/resource, “deploy”. There is a reference to the template object (just as we
specified in the supply chain object) and a reference to the object that was stamped out. Let’s examine that object:
Stamped Object
kubectl get -o yaml deployment hello-deployment
apiVersion: apps/v1
kind: Deployment
metadata: ...
spec: ...
status:
  availableReplicas: 3
  conditions:
    - lastTransitionTime: ...
      lastUpdateTime: ...
      message: Deployment has minimum availability.
      reason: MinimumReplicasAvailable
      status: "True"
      type: Available
    - lastTransitionTime: ...
      lastUpdateTime: ...
      message: ReplicaSet "hello-deployment-5dddb657c" has successfully progressed.
      reason: NewReplicaSetAvailable
      status: "True"
      type: Progressing
  observedGeneration: 1
  readyReplicas: 3
  replicas: 3
  updatedReplicas: 3
Success! We can tell that the deployment is ready on the cluster because its condition Available is true.
We should also note some of the metadata of our created object:
metadata:
  ownerReferences:
  - apiVersion: carto.run/v1alpha1
    blockOwnerDeletion: true
    controller: true
    kind: Workload
    name: hello
    uid: d86b7dbf-8fcf-466e-abab-ebbc25404a06
  ...
First, we see an owner reference to our workload. This is helpful in a number of ways. It allows easy tracking of relationships. If you use a tool like kubectl tree or kube-lineage, examining the workload will display the child objects created and the children of those objects.
kubectl tree workload hello
NAMESPACE  NAME                                        READY  REASON  AGE
default    Workload/hello                              True   Ready   ...
default    └─Deployment/hello-deployment               -              ...
default      └─ReplicaSet/hello-deployment-abc123      -              ...
default        ├─Pod/hello-deployment-abc123-def45     True           ...
default        ├─Pod/hello-deployment-abc123-ghi67     True           ...
default        └─Pod/hello-deployment-abc123-jkl89     True           ...
The other advantage of this owner relation is in cleanup. If the app dev deletes the workload, kubernetes will handle deletion of the child objects.
The other part of the metadata for us to observe are the labels:
metadata: ...
  labels:
    carto.run/cluster-template-name: app-deploy
    carto.run/resource-name: deploy
    carto.run/supply-chain-name: supply-chain
    carto.run/template-kind: ClusterTemplate
    carto.run/workload-name: hello
    carto.run/workload-namespace: default
Cartographer adds helpful labels to indicate all of the Cartographer objects involved in the creation of a stamped object (template, supply chain, workload).
Interacting with the app
As a final step let’s create a quick port-forward and see our deployment serve traffic:
kubectl port-forward deployment/hello-deployment 3000:80
Now we visit the site! http://localhost:3000/
We should see our app serving:
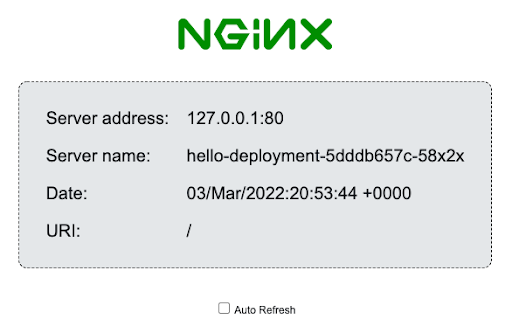
Wonderful. Our company’s first application has been delivered.
Steps for a second dev
We use Cartographer to create an application platform for our developers. Let’s act now as a second dev, bringing a new application to the platform.
We assume that all the app operator setup from above remains. All we need to do is create a new workload with a reference to a different pre-built image:
---
apiVersion: carto.run/v1alpha1
kind: Workload
metadata:
  name: whale-hello-there
  labels:
    workload-type: pre-built
spec:
  image: docker.io/crccheck/hello-world:latest
We can follow the same steps to observe the workload and the created objects. And we can do a similar port-forward (note that this app serves traffic on its 8000 port):
kubectl port-forward deployment/whale-hello-there-deployment 3000:8000
curl localhost:3000
<pre>
Hello World


                                       ##         .
                                 ## ## ##        ==
                              ## ## ## ## ##    ===
                           /""""""""""""""""\___/ ===
                      ~~~ {~~ ~~~~ ~~~ ~~~~ ~~ ~ /  ===- ~~~
                           \______ o          _,/
                            \      \       _,'
                             `'--.._\..--''
</pre>
Wrap Up
Congratulations, you’ve built your first supply chain! Here are some of the things you’ve learned:
- The relationship between supply chains and templates
- The syntax for templates to refer to workload values
- The relationship between the selector on a supply chain and the labels on a workload
- The creation and referencing of a service account for Cartographer to manage the objects specified by the supply chain
 Edit
Edit